
How to Protect Exterior Foundation Walls From Water
Think waterproofing is only needed when you see water? Learn why this belief can lead to costly damage. Discover how proactive measures protect your GTA home from hidden moisture issues.
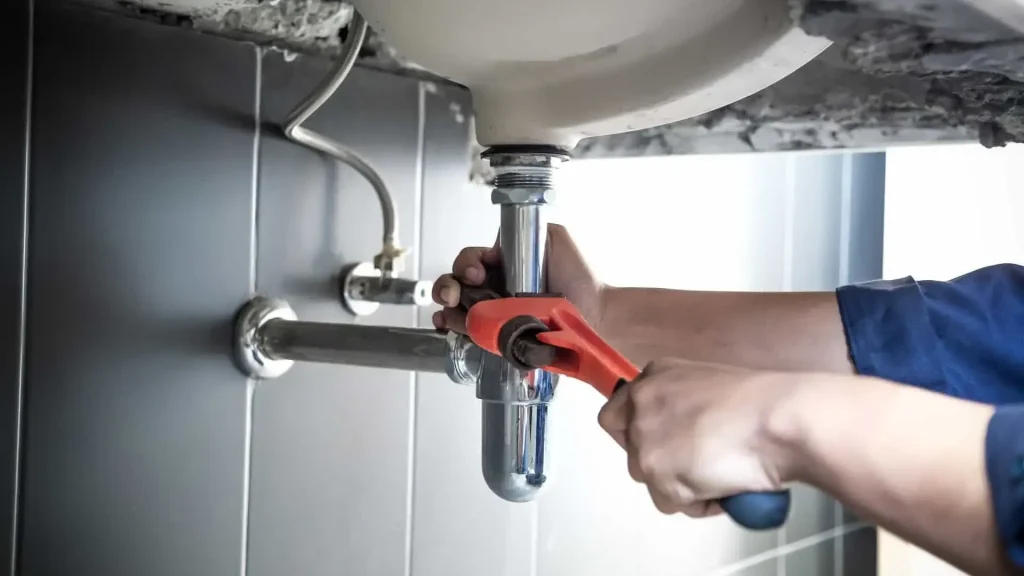
A tap that keeps moving at the base or a faucet that needs replacing may look like an easy job. The real trouble starts when you look under the sink. The nut holding the faucet is usually fitted high up behind the basin. Your hand may reach it, but a normal wrench often cannot turn in such a narrow space. A basin wrench is made for this exact job. Once you understand how it grips and turns, many small sink repairs become less tiring.
This guide explains How to Use a Basin Wrench for Home Plumbing Jobs without making the process confusing.
The area under a kitchen or bathroom sink is usually crowded. You may find water pipes, drain fittings, cabinet sides, supply lines, and the bottom of the sink all packed together.
An adjustable wrench needs room on both sides of the nut. In most sink cabinets, that space simply is not available. You may fit the wrench on the nut, but you will not have enough room to turn it.
A basin wrench works from below. Its long shaft reaches behind the sink, while the jaw at the top holds the nut. You turn the small bar at the bottom instead of trying to move your whole hand around the fitting.
You can use it for:
A basin wrench looks simple, but each part has a purpose.
The long metal rod helps you reach the nut. At the top, there is a curved jaw that moves from one side to the other. A spring helps the jaw hold onto the nut.
At the bottom, you will see a short sliding bar. This acts as the handle. You can move it left or right depending on the space available inside the cabinet.
Before starting the job, move the jaw with your fingers. It should open, turn, and close without getting stuck. If it feels stiff, clean it with a dry cloth and add one small drop of oil around the moving joint.
Do not start while the cabinet is full of bottles and cleaning items. Remove everything so you can sit, kneel, or lie down comfortably.
Place a towel on the cabinet floor. Keep a small bucket close to the supply pipes. Even after you shut off the water, a little water may remain inside the lines.
Keep these items nearby:
A headlamp is useful because both hands stay free. Plumbing jobs become much harder when you are trying to hold a torch and a tool at the same time.
Look under the sink for the hot and cold water valves. Turn each valve clockwise until it stops.
Now open the faucet. This releases pressure and lets the remaining water leave the supply lines.
Check whether the water has fully stopped. If it still runs, the shut-off valve may be faulty. In that case, close the main water supply before disconnecting anything.
Skipping this step can leave the cabinet wet within seconds, so always check twice.
Shine the light behind the sink bowl. The mounting nut will sit below the faucet. Some taps have one large nut in the centre. Others have two smaller nuts, one under each handle.
You may also see a metal plate, plastic washer, or support bracket. Take a quick photo before removing the parts. It can help when you need to fit everything back in the same order.
Older faucet nuts often collect rust, dust, and hard water deposits. Wipe away loose dirt first. If the nut looks stuck, spray penetrating oil around the thread and leave it for ten to fifteen minutes.
This is the part that confuses most first-time users.
The jaw must grip the nut in the direction you are turning. To remove the nut, set the jaw so it catches when the handle moves counterclockwise. To tighten the nut, flip the jaw so it holds while turning clockwise.
Push the wrench upward behind the sink. Move the jaw around the nut until you feel it catch.
Give the handle a light pull. If the wrench stays in place, the grip is correct. If it slides off, bring it down and reset the jaw.
Do not force the turn before the tool is properly seated.
Once the jaw grips the nut, turn the bottom bar slowly. Use steady hand pressure.
A badly stuck nut may not move on the first try. Do not pull suddenly. The wrench can slip, and your hand may hit a pipe or the cabinet wall.
Try these steps instead:
After the nut starts moving, keep turning until it becomes loose. You may then remove it with your fingers.
Place the new faucet into the sink hole from above. Check that the spout faces the right direction.
From under the sink, slide the washer and support plate into position. Start the mounting nut by hand. Turn it a few times before using the wrench. This helps prevent the nut from going onto the thread at an angle.
Now place the basin wrench on the nut and turn clockwise.
Tighten it in small turns. Check the faucet from above after every few turns. It should remain straight.
Stop when the faucet no longer moves. More force does not mean a better fit. Too much tightening may crack a plastic nut, damage the sink, or spoil the thread.
Reconnect the water supply lines and tighten them carefully with an adjustable wrench.
Open the shut-off valves slowly. Turn on the faucet and let the water flow for a short time.
Use a dry tissue to check:
A tissue will show a tiny leak faster than your fingers.
Small leaks should not be ignored. Waterproofing Less often sees moisture damage that began with a slow drip under a sink. Over time, that drip may swell cabinet boards, stain walls, damage flooring, or create a damp smell.
The Wrench Does Not Hold the Nut
The jaw may be facing the wrong direction. Flip it and try again.
The Handle Hits the Cabinet
Slide the lower bar to the other side. You may also need to turn the wrench in shorter movements.
The Nut Is Covered in Rust
Apply penetrating oil and wait. Do not keep pulling harder, as the nut or fitting may break.
The Nut Is Made of Plastic
Use gentle pressure. Plastic mounting nuts can crack when tightened too much.
The Faucet Still Moves
Hold the faucet straight from above while tightening the nut from below.
Some sink jobs go beyond a loose faucet nut. Stop the work and call a plumber when a water valve leaks, a pipe begins to crack, a fitting breaks, or heavy rust has damaged the connection.
Professional help is also sensible when water has already reached the wall, flooring, or cabinet panels. Replacing one damaged part early may prevent a much larger repair.
It helps remove or tighten faucet nuts fitted behind a kitchen or bathroom sink.
Only when the nut is easy to reach. Pliers usually struggle in deep, narrow spaces.
Turn it counterclockwise in most standard plumbing fittings.
The jaw may be reversed, or the nut may have grease, dirt, or heavy rust on it.
No. Basic care, correct jaw placement, and slow turning are usually enough for simple faucet work.


Think waterproofing is only needed when you see water? Learn why this belief can lead to costly damage. Discover how proactive measures protect your GTA home from hidden moisture issues.
Think waterproofing is only needed when you see water? Learn why this belief can lead to costly damage. Discover how proactive measures protect your GTA home from hidden moisture issues.

Think waterproofing is only needed when you see water? Learn why this belief can lead to costly damage. Discover how proactive measures protect your GTA home from hidden moisture issues.